Remote Obstacle Finder | Raspberry-Pi.
Obstacle detection is an important aspect in an Automotive and Automobile System. The basic obstacle detection is already done. Check here. Now, moving on to the next level. The detection and the range of the obstacle is identified remotely. Let us see how it works.
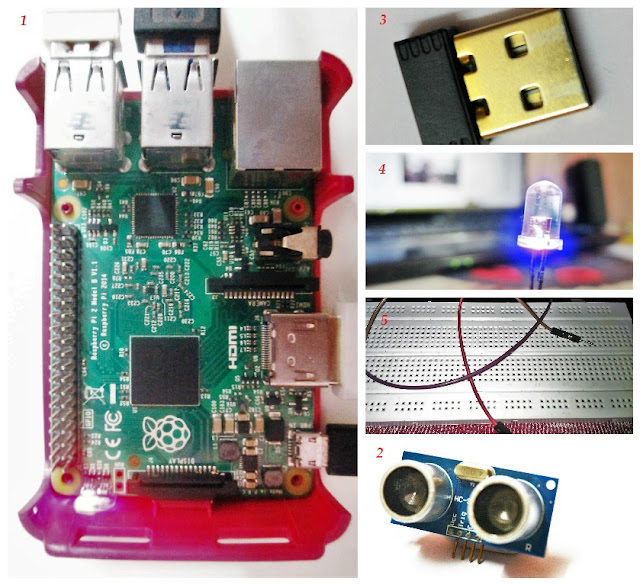
Hardware Required
- Raspberry-Pi ( Refer the first booting of pi here )
- HC-SR04 (Ultrasonic Module)
- WiFi Adapter (If R-pi2 is used)
- LED
- Hookups
- Protoboard
List of Hardware
Software Required
After booting up your Raspberry pi with Raspbian. The application software which is required to run the program is Python. Python is pre-installed in OS. If you did'n have it do the following. Open Terminal Window and type the following...
- sudo apt-get update
- sudo apt-get upgrade
- sudo apt-get install python3-picamera
After setting up your Raspberry pi. Move to the Wiring of sensor and Pi.
Wiring Method
Connect the Sensor LED and the R-pi with the help of Hookups and protoboard as shown.
Circuit Schematic
After finishing the wiring. This body has to be soul with the help of python programming. The soul helps the body to work perfectly.
Being Soul the Body
Python is an most effective and reusable programming which is having an advanced features than other languages.
Python (Editor & Execution Window)
I make it easy for you. Just copy and paste the code in Editor window form here. Run the code to test it with the help of F5 key.
Remote Access
Here is the best part of the project. The remote access of the system. You could access and run your program from PC, Smart phone or Tablet. All you need to do is connect your R-pi and your control device (PC, Smartphone or Tablet) in a same network with the help of WiFi Adapter.
For Android : Mobile SSH
For PC : PuTTY
For Window's phone : SSH
For iOS : SSH
Download and Install the compatible app for your device and connect your device as the same IP of your R-pi.
Here I showed example for Android Devices.
Check your R-pi IP address
R-pi Window
Android device connection Method
Steps to be followed
Login with your own user name and password. Once the connection is established successfully, we need to run the python program which is already located in the system. For that type
python yourfilename.py
Execution of Program
Hardware Output
Feel free to post your doubts and questions
Ping me @ Abu Taj


Comments
Post a Comment